
What Are EMT Waterproof Connectors and How Do They Work?

Emt Waterproof Connectors are fittings designed to join electrical metallic tubing (EMT) to boxes or enclosures while limiting water entry. Common designs use compression bodies, sealing rings, or gaskets to close gaps around the tubing and enclosure opening. They create a barrier. They do not make every part of an electrical installation waterproof. The term can be a little misleading: protection depends on the connector’s rating, compatible components, and correct installation. That distinction is easy to overlook.

During installation, the connector secures the EMT and helps seal the point where it enters an enclosure. A compression fitting may tighten around the tubing, while a gasket or sealing washer helps close the opening. Proper alignment matters. A crooked fitting, damaged seal, or loose connection can leave a path for moisture. Before choosing one, consider the location, expected exposure, tubing size, and enclosure type. Check the manufacturer’s instructions and product markings for the specific environmental rating; products that look similar may offer different levels of protection. Also confirm that the enclosure itself is suitable for the setting. A connector alone cannot protect an unsuitable box or poorly sealed system. For a dependable installation, match the connector to the application and follow its specified assembly steps. Small details matter here. The final seal is only as reliable as its weakest point.
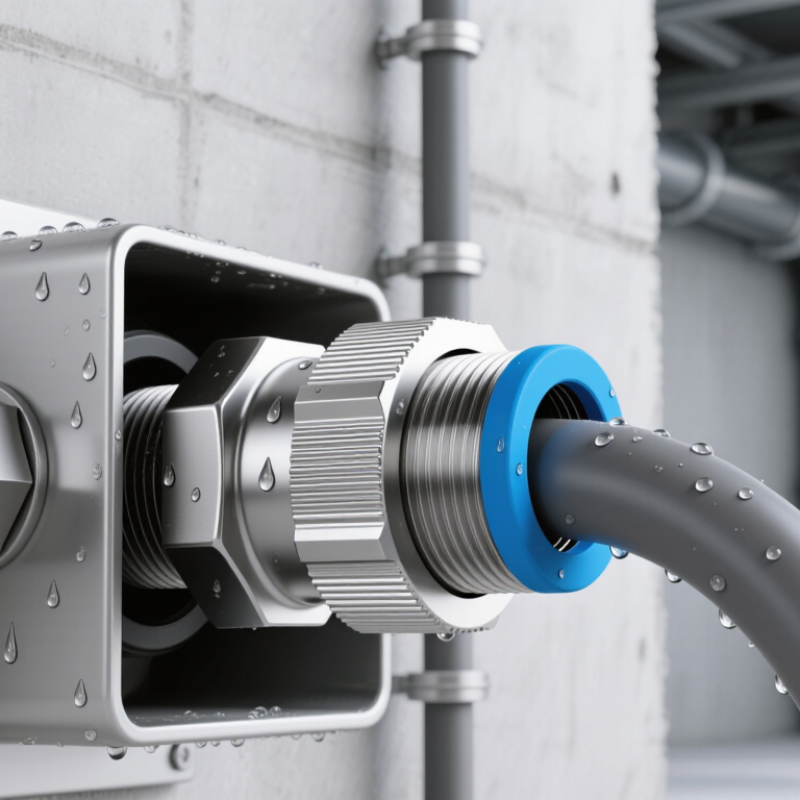
What Are EMT Waterproof Connectors and How Do They Work?

What EMT Waterproof Connectors Are and Where They Are Used

EMT waterproof connectors join electrical metallic tubing to boxes or enclosures while limiting water and dust entry. The key distinction: ordinary EMT fittings are not automatically waterproof. A connector must carry a suitable environmental rating and match the enclosure, conduit, and installation conditions. These fittings are commonly used outdoors, in damp utility rooms, and near washdown areas, where spray or condensation can reach conduit joints.

IEC 60529 defines IP protection ratings. For example, IP67 means dust-tight protection and tested immersion in water up to one meter for 30 minutes. That rating describes tested conditions, not every real-world installation.

NEMA 250 also classifies enclosure protection, including resistance to rain and hose-directed water for certain types. A connector’s rating does not automatically upgrade the whole assembly. Seals, thread engagement, and the box entry all matter. Even experienced installers can overlook a small gap.

Tips: Check the connector’s listed rating and installation instructions. Inspect the gasket for cuts, and avoid overtightening; a crushed seal may leak. When exposure is uncertain, verify the complete assembly’s rating before installation.

Key Components and Materials of an EMT Waterproof Connector

What Are EMT Waterproof Connectors and How Do They Work?

Key Components and Materials of an EMT Waterproof Connector

An EMT waterproof connector links electrical metallic tubing to an enclosure while helping limit moisture entry. Its body is commonly made from corrosion-resistant metal or durable polymer. A compression nut, sealing ring, and threaded hub form the main connection. Some models also include a gasket or locknut where the connector meets an enclosure. Small parts matter.

As the compression nut tightens, it presses the sealing ring around the EMT. This creates a snug seal and helps resist water, dust, and movement. The hub and gasket seal the enclosure opening. Performance depends on the connector’s rating and correct installation; “waterproof” does not mean every connection can withstand immersion. Dirt, damaged threads, or a misplaced gasket can weaken the seal.

Tips: Match the connector to the tubing size and the enclosure’s opening. Keep sealing surfaces clean, and follow the specified tightening instructions. More force is not always better; it can deform parts. Check the finished joint for gaps, and replace worn seals rather than relying on a quick fix.

How the Connector Forms a Secure, Water-Resistant Seal

An EMT connector does not become waterproof simply because it fits tightly. For a water-resistant connection, a listed wet-location fitting uses a resilient gasket and a compression mechanism. The gasket presses against the enclosure wall; the compression ring grips the conduit. Together, they limit paths for water and damp air. Small gaps matter.

IEC 60529 classifies enclosure protection by test conditions: IPX4 covers splashing water, while IPX5 covers water jets. These ratings describe tested protection levels, not a guarantee that every EMT joint will stay dry. UL 514B provides requirements for conduit, tubing, and cable fittings. Check the fitting’s marking and instructions for the intended location and protection level.

During installation, seat the gasket flat against a clean, smooth box surface, then tighten the fitting as directed. A twisted seal or damaged conduit edge can leave a narrow leak path. One detail is easy to miss. Over-tightening may distort parts, while under-tightening can loosen the grip. Even a correctly assembled connector cannot compensate for a poorly sealed enclosure opening or water pooling above the joint. I would not call every gasketed fitting waterproof; the actual rating and installation conditions matter.

Installation Steps for Connecting EMT Conduit

A Waterproof Emt Connector helps keep rain and moisture out where conduit enters an electrical box. The fitting must be rated for the location; standard EMT fittings are not automatically waterproof. Check the fitting instructions and enclosure rating before starting. Turn off power and verify the circuit is de-energized. Keep it square.

Measure the EMT, cut it cleanly, and remove sharp burrs that could damage conductors. Slide on the connector, then secure it to the box with its locknut or specified fastener. Fit the conduit fully into the connector and tighten its set screw or compression nut as directed. A gasket or sealing ring compresses against the box or conduit to limit water entry. Small details matter.

Check that the conduit run is aligned and supported, with no strain pulling on the box. I would recheck the seal after tightening; it is easy to assume a snug fitting is sealed when it is not. Do not add sealant unless the fitting instructions allow it. Restore power only after the enclosure is closed and the installation has been inspected. For unfamiliar wiring or wet-location work, use a qualified electrician.

What Are EMT Waterproof Connectors and How Do They Work? - Installation Steps for Connecting EMT Conduit
Topic or Step What It Means Installation Detail or Check
Connector purpose An EMT connector secures the end of electrical metallic tubing (EMT) to an electrical box, enclosure, or fitting. Choose a connector compatible with the EMT trade size and the enclosure entry.
Meaning of “waterproof” “Waterproof” is often used informally. A fitting described as rain-tight or listed for wet locations is designed to limit water entry when installed as specified. Verify the fitting’s markings and instructions for the intended location. A connector alone does not make the entire conduit system waterproof.
How the seal works Depending on its design, a wet-location EMT connector may use a sealing ring, gasket, or other listed sealing feature at the enclosure connection. Seat the seal evenly and tighten the connector as directed. Do not omit, damage, or substitute sealing parts.
1. Make the circuit safe Electrical work can cause shock or injury if conductors are energized. Switch off the relevant circuit, prevent accidental re-energizing, and verify absence of voltage with a suitable tester before work begins.
2. Select compatible parts EMT and fittings are available in trade sizes; the connector must match the conduit and enclosure opening. Confirm the size, material compatibility, wet-location suitability, and enclosure rating required for the installation.
3. Cut and prepare EMT A clean, square cut helps the conduit seat properly and protects conductors from sharp edges. Cut the EMT to length, then remove internal and external burrs. Keep metal filings out of the enclosure.
4. Attach the connector to the enclosure The connector’s threaded end or locknut arrangement attaches it to a compatible box or enclosure entry. Install the gasket or sealing washer in the specified position, if supplied, and tighten the locknut or other attachment as instructed.
5. Insert and secure the EMT The conduit enters the connector and is held by its compression mechanism or set screw, depending on connector type. Insert the EMT fully to the connector’s stop or specified depth, align it, and tighten the clamp or set screw according to the product instructions.
6. Check support and continuity EMT and its fittings are part of a wiring method that must be properly supported and maintain required electrical continuity. Check that the conduit is secure, fittings are tight, and the installation complies with applicable electrical rules and local inspection requirements.
7. Inspect the finished connection A correctly assembled connector should have no visibly displaced seal, loose conduit, or exposed sharp edge. Check the enclosure cover and all other entries and joints too; the protection level depends on the complete installation, not just one connector.
Important note Use fittings only within their listing and follow the manufacturer’s installation instructions, the applicable electrical code, and local requirements. Consult a qualified electrician when unsure.

Environmental Ratings, Limitations, and Selection Factors

EMT waterproof connectors join electrical metallic tubing to boxes while limiting water entry at the connection. But “waterproof” is not one universal rating. EMT itself is not automatically watertight; protection depends on the connector, gasket, enclosure surface, correct tightening, and installation orientation. A poor seal can let water track along threads or collect beneath a fitting.

Check the marked environmental rating and what it actually covers. IEC 60529 defines IP water tests: IPX5 uses water jets at 12.5 liters per minute, while IPX7 tests temporary immersion at one meter for 30 minutes. An IPX5 result does not establish immersion protection. NEMA 250 uses a separate enclosure-rating system, so NEMA and IP ratings should not be treated as direct equivalents. Neither lab rating guarantees performance after gasket aging, chemical exposure, UV damage, or rough installation.

Tip: Match the rating to the real exposure, then inspect gasket seating and threaded engagement. Small details matter. For washdown areas or standing water, confirm the complete installed assembly is suitable; a fitting’s rating alone may not cover the tubing, enclosure, or field-made joints.

What Are EMT Waterproof Connectors and How Do They Work?

Water-Exposure Ratings at a Glance

The chart shows the water-protection digit in each IP code; the digit is a rating category, not a linear measure of protection. IPX4 covers splashing, IPX5 and IPX6 cover water jets, and IPX7 and IPX8 cover immersion under specified conditions. An EMT connector is not automatically rated for these conditions: verify the listing and environmental rating of the complete installed assembly, including fittings, conduit, enclosures, and seals. “Rain-tight” does not mean submersible.